
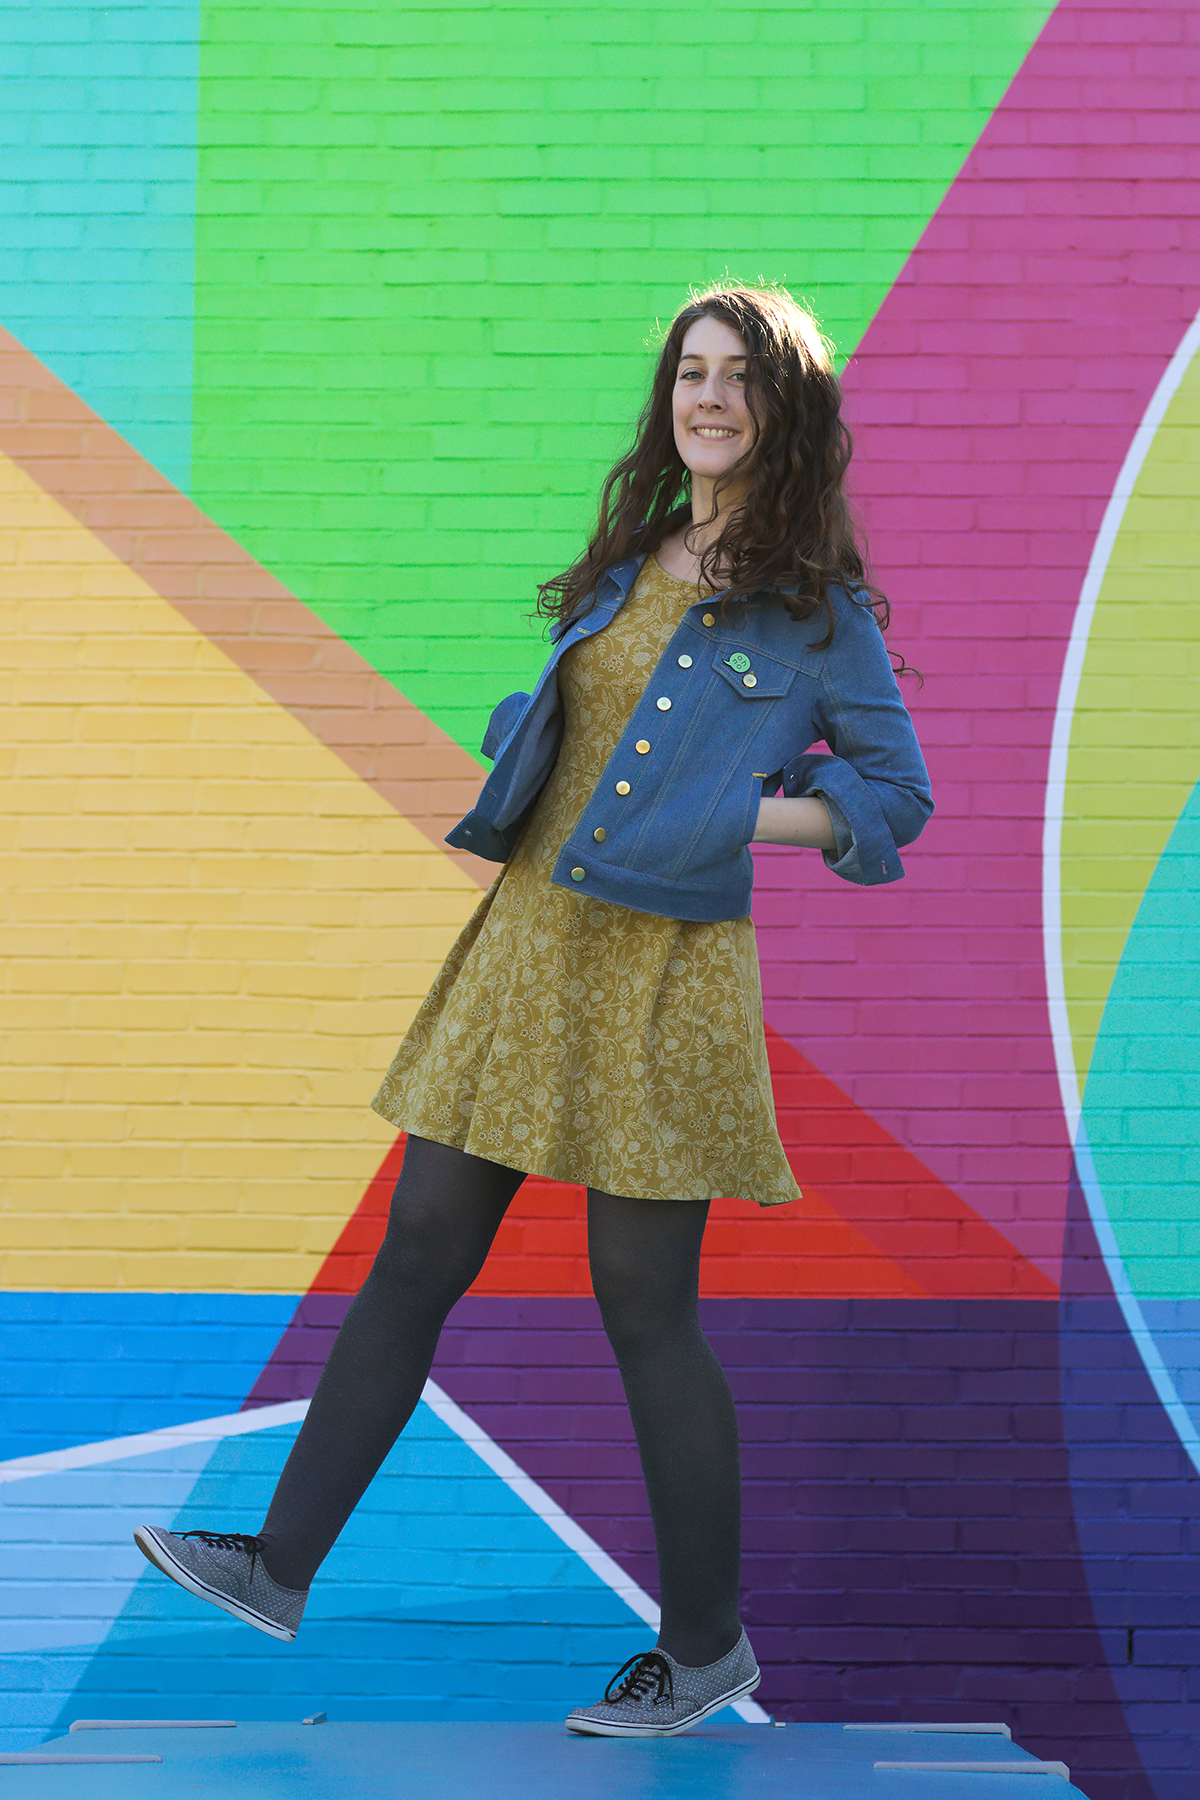
Today let’s talk about one of my favorite garments for mid-season: my denim jacket! I sewed it last year but it had been years since I wanted to sew one, I even had the fabric and pattern in my stash but it took me so long to take the leap… well I’m very happy I finally did because now I wear it all the time!

It all began when I spotted – over 10 years ago now! – this denim jacket in the February 2010 Burda issue. A few years later, I was reminded of it by this very nice version on the Four Square Walls blog. I constantly postponed getting started on it, lacking the courage to trace the pattern and add the seam allowances, which I have lost the habit of doing. When finally, last summer, I decided to take the plunge, I realized that the model was in short sizes, intended for a stature of 1m60! After checking the measurements, I would have had to lengthen it by several inches below and above the chest, which would have meant adjusting the sleeve heads, and that was not something I was willing to do. So I fell back on the other denim jacket pattern I had in my pattern stash: the Audrey jacket from Seamwork. I didn’t like the boxy cut as much, but at least this pattern has real pockets which is pretty important for a jacket.
I had a Seamwork subscription for a few years: I wanted to support the magazine since I find its content very interesting, and I really like the idea of basic and quick sewing patterns, which I find especially rewarding to make now that I spend so much time sewing for work. However so far all my attempts with the Seamwork patterns had been unsuccessful: I tried making muslins for the Gretta tank top and the Moji pants, and both really did not suit me at all to the point that I had given up on adjusting them. I’m not a fan of their pattern sheets either. For Audrey, for example, each piece is on the sheet several times, in different size groups: it’s difficult to navigate, and that also means that a lot of useless pages get printed. That being said, I have seen some really cool versions of some of their patterns: the Audrey jacket is a good one, or the Catarina and Georgia dresses. My point being, I think it’s worth looking at these patterns on a case-by-case basis.

A lot of reviews of Audrey recommended going down one size, so that’s what I did. While I’m a size 2-4 bust and size 2 waist in the Seamwork measurement chart, I made a size 0 all over (the smallest) and I still have lots of ease. This is where I realize how useful it is to be able to read blog posts with detailed comments, especially when there are issues with a pattern. Instagram is great, but not really the right format to go into details on this kind of topics, and it’s hard to search for information.
And speaking of issues, boy did I have issues with this pattern! I know Seamwork had a sewalong for this jacket last December and they took the opportunity to fix a few things in the instructions for the sleeve cuffs and vents, but the erratum is quite vague so it’s possible that some of the problems I encountered still remain.

If you want to give this pattern a try, here are the different issues that I had and that I strongly encourage you to double-check before cutting into your fabric:
- Piece H (side back panel): the size numbers were wrong on the double notches.
- Pieces R and Q (pocket lining and facing): both pieces were way too small and didn’t extend far enough to be caught in the waist seam and the button band as shown on the diagrams. I added 2 cm in width and 4 cm in height so that they would fit.
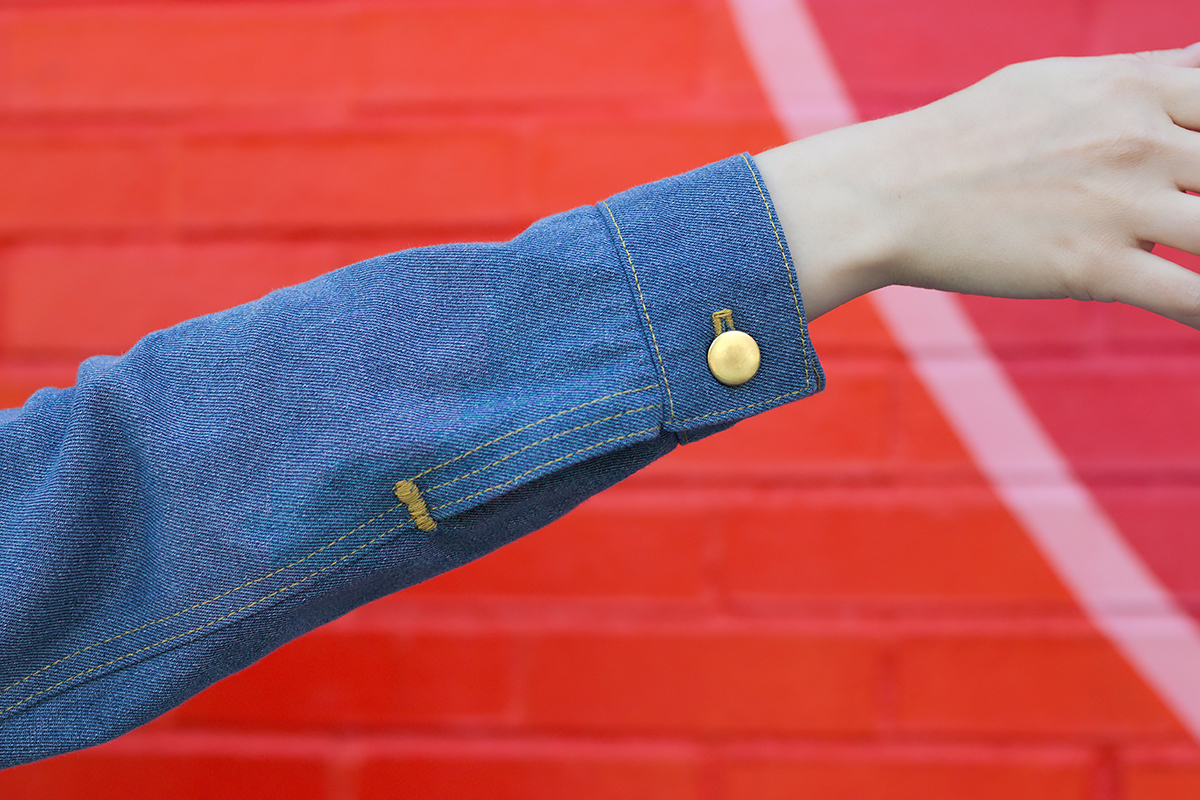
- Pieces I and K (upper and under sleeve): I was missing 1/4” on each side to be able to fold the slits correctly, and following the instructions I ended up with raw edges. I managed to get a wearable result by making super tiny folds, 3 rows of topstitching, and huge bartacks to catch the raw edges. Unfortunately Seamwork does not usually provide detail pictures of the garments so I couldn’t see what the finished sleeves should have looked like. According to a previous description of the erratum this would have been fixed since, so make sure you download the latest version from their website!
- Topstitching: the instructions were pretty unclear on where and when to topstitch. On the collar for instance topstitching wasn’t mentioned, though the pictures of the finished jacket clearly show two lines of topstitching. It also wasn’t specified when to do one row of topstitching and when to do two (for instance on the sleeve cuffs or the pocket flaps) nor how far apart the two rows should be.
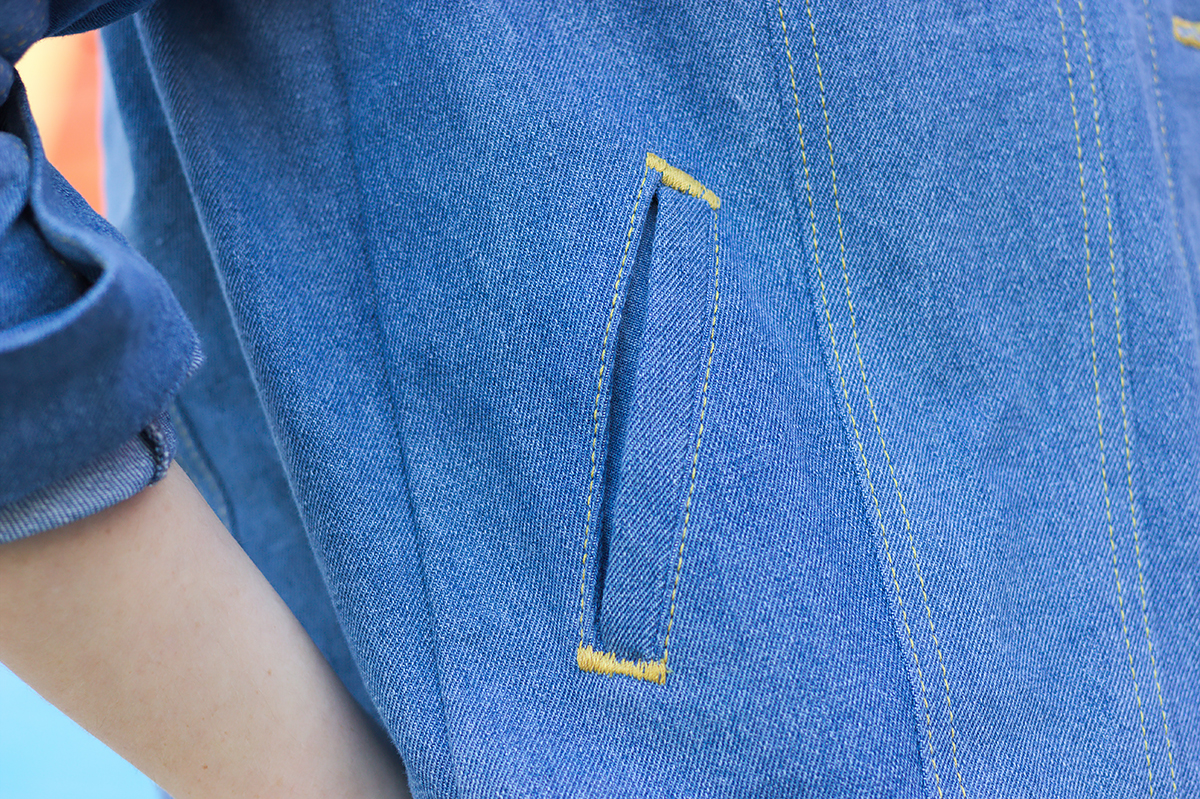
- Welt pocket: the illustrations and text didn’t match, there was a fold on the welt on the diagram that wasn’t mentioned in the instructions. Also, the top and bottom of the welt are left raw. It’s on the inside of the pocket so it’s not too bad, but I would have wanted to change that.
In the end, I hacked my way through. I really regretted not having pictures of the jacket’s details to refer to, especially on the sleeve vents and welt pockets, so I hope my comments and pictures can be helpful to you if you’re interested in making this pattern!
One last piece of advice: I cut my main pieces from 10 oz. denim but I cut the pocket facing and pocket lining pieces from 6.5 oz. denim, in a lighter weight but the exact same color. This allows for less thickness in this area, which makes for a more comfortable jacket.

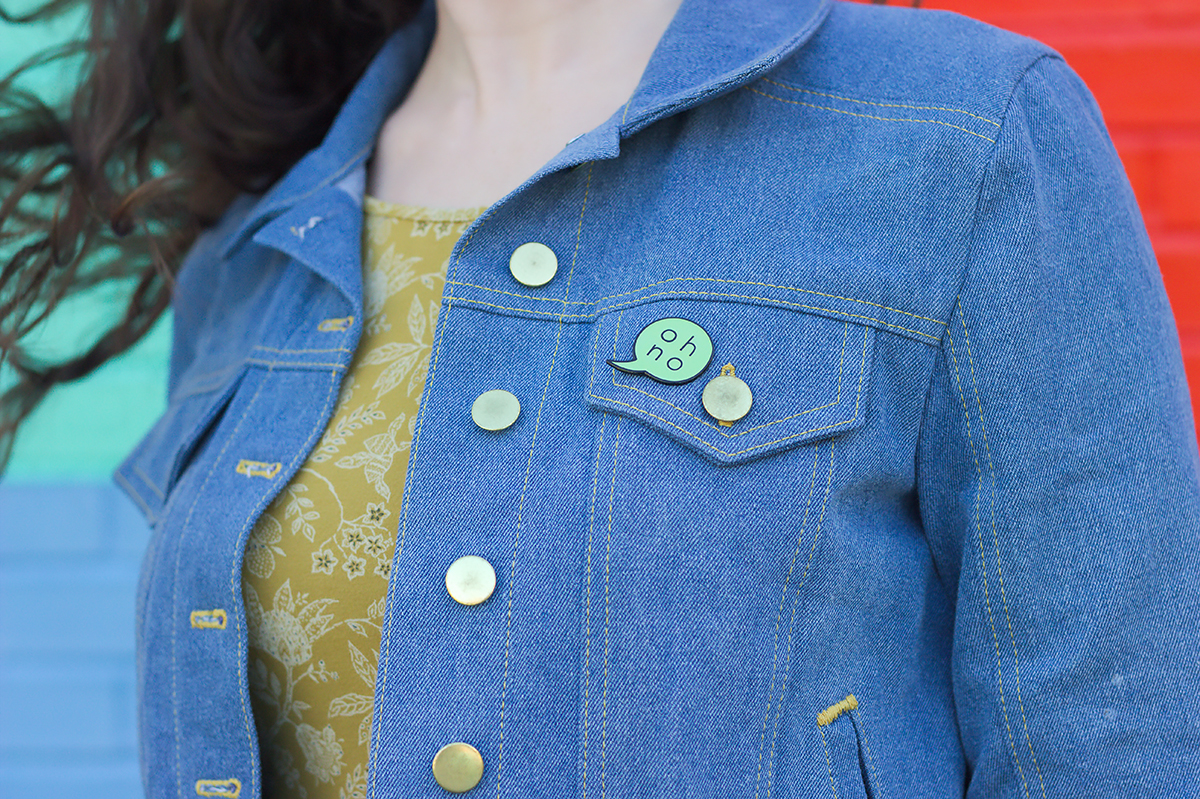
Despite all of this, I love the finished garment: it was well worth all the hassle. And to commemorate the struggle, I always wear it with my favorite enamel pin!

It looks great despite the errors in the pattern. It’s so disappointing that they don’t take more care with their drafting. I’ve just made my first ever Seamwork pattern, just some leggings, which were fine, but I’d be quite wary of something more complicated.
Yeah it is disappointing because there’s also so many good things about this pattern and I love the final result. Good thing to know about the leggings!
I read about one line of the section on pattern errata and quickly jumped to the next paragraph that’s a lot of hurdles to jump! It looks beautiful. And I agree…I miss blog posts for all the information!
Another excellent review! I’ve been hankering for a denim jacket—I haven’t had one since middle school, and it didn’t fit particularly well—and this in-depth look at the Audrey has definitely convinced me to look elsewhere. (The Alina Design Co. Hampton, perhaps?) I’d never have guessed at all the hacking you had to do, because your finished jacket looks great! So much so that you’ve given me jacket envy. 😉
I’ve heard great things about the Hampton! Let me know if you ever make it I’m curious to have your opinion 🙂
Thanks!
It seems like everyone is sewing Seamwork again. I had bad experiences with Colette and was trying to tell if they were actually getting better or just doing more marketing. I think this post just confirms that they have not fixed their ways…
Honestly I couldn’t tell since I haven’t made any of their recent patterns, the Audrey is already a few years old. But their latest designs are not my style so I’m going to wait and see.
Hi, thanks for the review! I made Audrey too and it is my favorite Seamwork pattern. I don´t remember any troubles except a lack of information about topstitching. I think I made a size 8 or 10. You can see pictures in my blog post https://www.sijeplete.cz/siti/klasicka-dzinova-bunda-audrey-jacket/.
I sewed 14 Seamwork patterns so far and I didn´t finish or wear half of them. It is not a good ratio I am afraid. 🙁 I have trouble with fit mostly.
On the other side, I love Design Your Wardrobe program and the magazine. So I am not ready to leave the Seamwork company yet. 🙂
Loooove your jacket and the pocket detail!