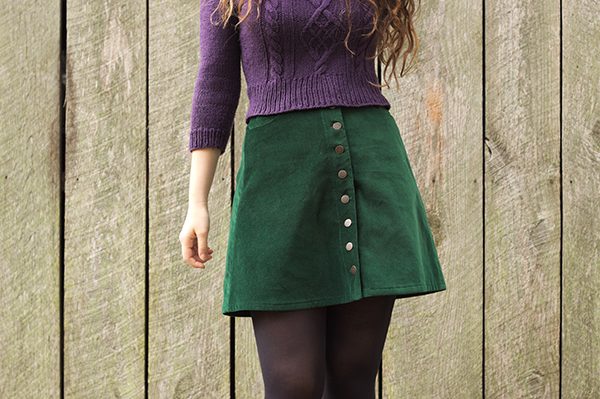
Two years ago, I made a Rosari skirt in denim. I thought I would wear it mainly in the spring, with a t-shirt and sneakers, but it quickly became a staple of my winter wardrobe paired with opaque tights. I wanted to make a new version in a true seasonal fabric: forest green velvet, perfect for the holidays!
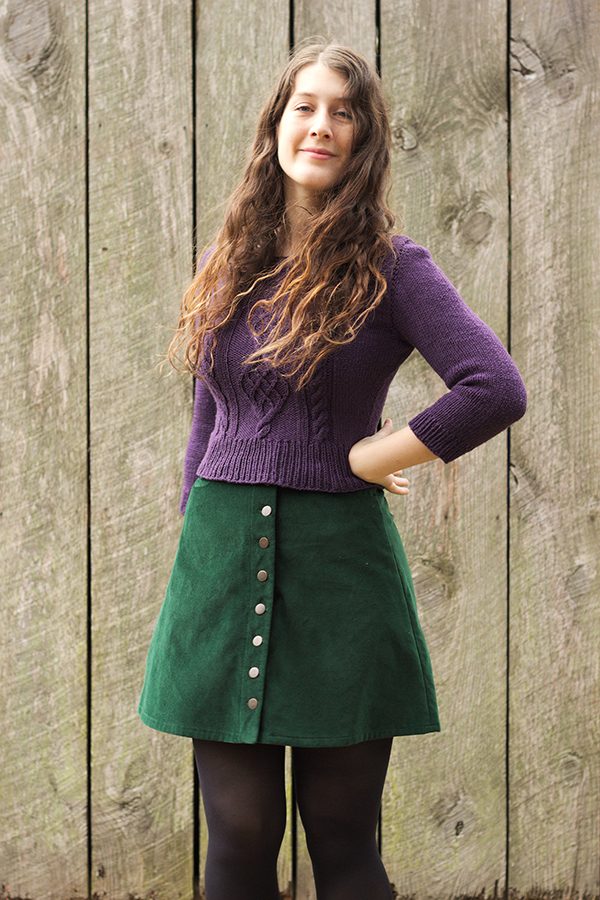
For my first version, I tried grading at the side seams, from a size 36 at the waist to a size 40 at the hips, which created a bunch of issues at the sides and back. This time I went with a different approach: I started with a size 36, following my waist measurement, graded to a size 38 at the hips on the front and back pieces. Then, I did a 2 cm Full Butt Adjustment on the back piece, using this tutorial, to reach a hip measurement of 98 cm and finished measurement of 106 cm, corresponding to the numbers for size 40.
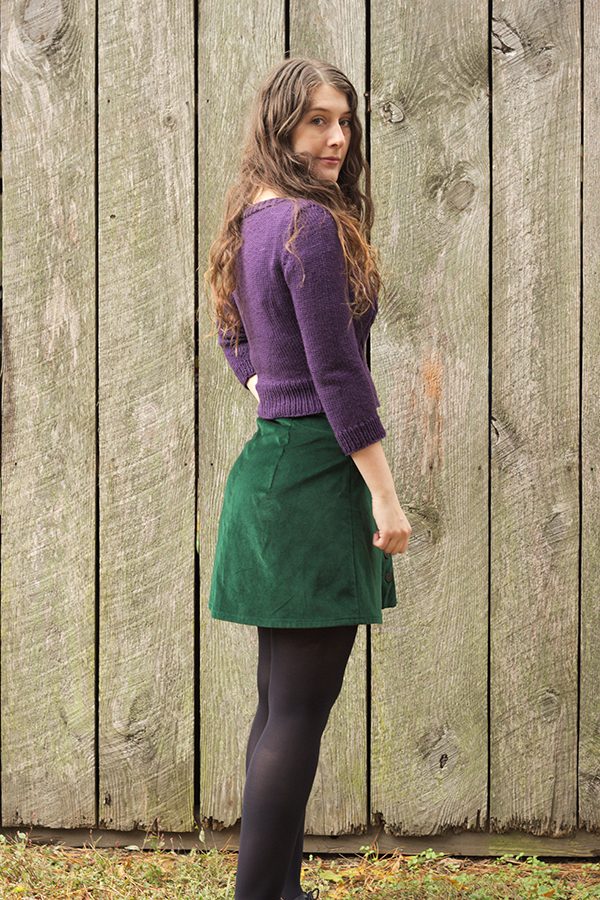
This time I didn’t have to take the sides in, so it looks much better from the front. However 2 cm is a lot for an FBA, and the resulting darts are huge, so from certain angles my butt looks a little… cubic. Next time I’ll need to divide the darts into two on each side, which should look better. There are still a few folds and drag lines, but it’s already a thousand times better than my first attempt:
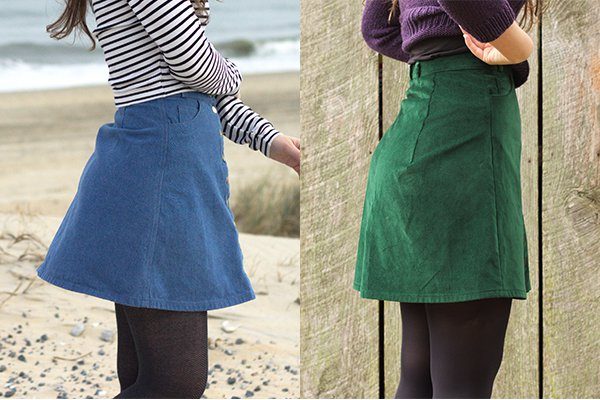
Other changes are the same than on my previous version: I lengthened the skirt by 5 cm, and lengthened the waistband piece by 1 cm so it would match the skirt. I mentioned that issue to Pauline who confirmed that there was an error in the pattern and that she was going to issue an erratum, but I don’t have access to my previous orders on her new website so I can’t check that it has been fixed. Don’t hesitate to measure your pattern pieces before cutting your fabric if you want to sew a Rosari skirt!
For the next one, I think I’ll also change the direction of the buttonholes so they are vertical and not horizontal. I had already thought about that last time, but I forgot and only remembered after making a couple. Since the buttonholes are horizontal and centered on the buttonband, the buttons are not, and that annoys me.
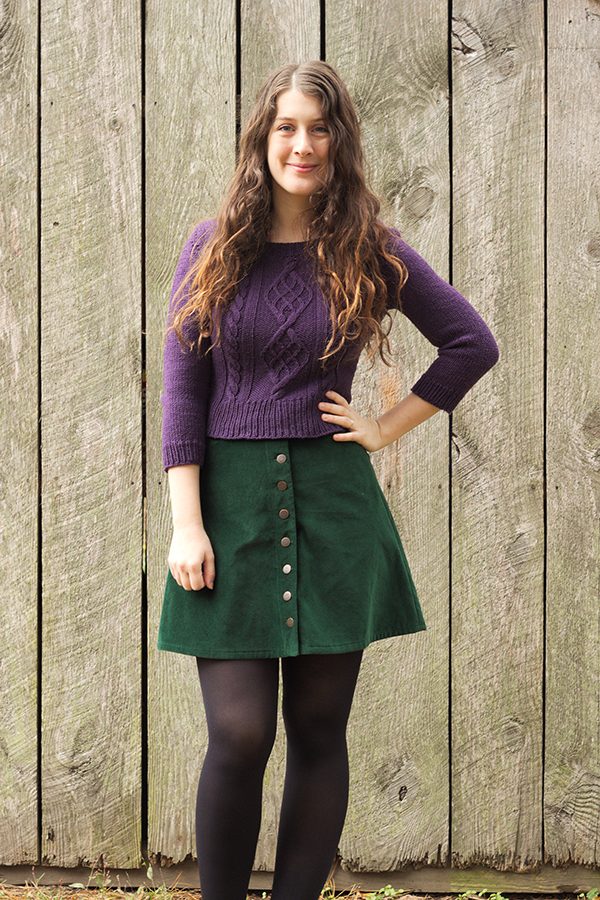
The fabric is this Robert Kaufman velveteen, that I had already used in another colorway for my elvish dress. It’s a really nice fabric to work with, not as difficult as actual velvet but soft and with a very deep color. I cut my pattern with the pile running downwards as I usually do ( = it’s soft when you run your hands top to bottom when wearing the garment). I recently bought some velvet pants from Uniqlo and noticed that the fabric was cut the other way. I’ve heard this makes for a deeper color. I don’t know if there’s a convention… Which way do you cut velvet?

In this green velvet, this skirt is the ultimate Christmas skirt, and now that it is december I have every intention to wear it with a red sweater completely unironically. But I also noticed that this green works with a lot of pieces in my wardrobe, which is mainly blue or generally cool-colored. I especially like this green and purple combo, with this Chuck sweater I finished last year. I also started knitting a sweater in a color named “Aubergine” which is actually halfway between raspberry and plum, and I think it’ll work great with this skirt!

Christmas Rosari
Rosari – Pauline Alice
Size 36 – 38
FBA of 2 cm
Lengthened by 5 cm
Kaufman Velveteen from Fabric.com
Wow. What an improvement. From experience with buttons over the bust, horizontal buttons take the strain and stay closed, vertical buttons stretch in the middle under pressure and pop open. I’d widen the facing on the band so you can move the horizontal buttonhole over so the button is centered.
Oh that’s a good point, I didn’t think of that. I’ve never had that problem with a skirt though, even though all my other skirts have vertical buttonholes (except for the one at the waistband). Maybe it has something to do with the size of the buttons too?
I’d always put the pile running downwards, like you did, because that’s how my velvet dresses were when I was little! I think it’s maybe also less likely to get matted that way, but who knows?
Yes I think you’re right! I read that marks show less when the fabric is cut with the pile running downwards so that must be linked.